
|
|
Articles
Optimize Adobe Acrobat Reader By Means Of New Functional Buttons
- Introduction
- Make Adobe Acrobat Reader Transparent
- Keep Adobe Acrobat Reader Always on Top of Other Windows While Reading
- Minimize Adobe Acrobat Reader to Tray
- Resize Adobe Acrobat Reader to Most Usable Size
- Position Adobe Acrobat Reader to Most Preferable Place on the Desktop
- Roll Up Adobe Acrobat Reader
- Move Adobe Acrobat Reader to Next Monitor
- Conclusion
- Useful Links
Introduction
Adobe Acrobat Reader is a program that is used for reading full fiction and non-fiction novels, huge texts or overlooking some papers and the results of scientific researches in the form of a PDF (Portable Document Format) document.
However, if you constantly read books on your computer, you may find it useful to add a whole bag full of new delightful features to Adobe Acrobat Reader to spice up your reading experience! Check out our Actual Title Buttons, it is a terrific program and especially helpful for work with Adobe Acrobat Reader.
Actual Title Buttons is a window navigation system which allows controlling windows' 'behavior' by means of both keystroke combinations and buttons placed near standard Microsoft� Minimize/Restore/Close ones. Actual Title Buttons allows you to add the new handy Minimize Alternatively, Stay Always-on-Top, Roll Up, Make Transparent and other additional buttons to Adobe Acrobat Reader�s title bar. And it also works with other programs as well!
Below are given examples on how Actual Title Buttons can enhance your work with Adobe Acrobat Reader.
Make Adobe Acrobat Reader Transparent
You can make Adobe Acrobat Reader transparent to enjoy awesome beauty of your favorite wallpaper at the desktop.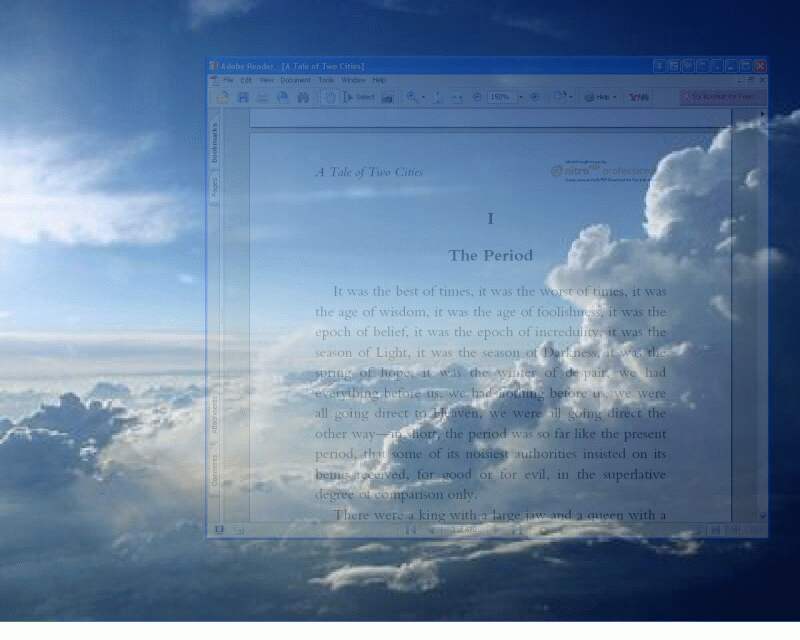
- Create specific settings for Adobe Acrobat Reader, enable the required Make Transparent title button and don't forget to save changes
- Set a nice ambient and colorful desktop background
- Disable desktop icons temporarily (Windows� XP and Vista users only)
- Open your book in Adobe Acrobat Reader and maximize it (Ctrl-L) and fit to width (Ctrl-2)
- Left-click the
 Make Transparent button to apply 20% transparency or right-click it to adjust the custom transparency level in the related trackbar control
 - Now you can fully appreciate the real beauty of your desktop through your favourite book, opened in Adobe Acrobat Reader!
As our client Kyle Rich says:
|
This makes my readings as big as possible, and gives me the beauty of my very own desktop to enhance the mood. |
![]() Ghost button can be especially effective when used together with the above mentioned Make Transparent function if you don't need the direct interaction with the document opened in Adobe Acrobat Reader and need it just for a reference. Ghost will bypass all mouse clicks directed at the Adobe Acrobat Reader completely, allowing you to work with underlying windows. You can Unghost Adobe Acrobat Reader using: a hotkey (Win+G, by default) or a keyboard shortcut for Cancel ghost mode action or taskbar button: i.e., left-click to minimize/restore it and right-click to call up its window menu.
Ghost button can be especially effective when used together with the above mentioned Make Transparent function if you don't need the direct interaction with the document opened in Adobe Acrobat Reader and need it just for a reference. Ghost will bypass all mouse clicks directed at the Adobe Acrobat Reader completely, allowing you to work with underlying windows. You can Unghost Adobe Acrobat Reader using: a hotkey (Win+G, by default) or a keyboard shortcut for Cancel ghost mode action or taskbar button: i.e., left-click to minimize/restore it and right-click to call up its window menu.
Keep Adobe Acrobat Reader Always on Top of Other Windows While Reading
The ![]() Stay Always-on-Top button puts Adobe Acrobat Reader on top of other windows in such a way that it is always accessible and couldn't be hidden by other windows. It is a great function when working with multiple windows open at once, particularly when you need to drag-n-drop some information from/to Adobe Acrobat Reader.
Stay Always-on-Top button puts Adobe Acrobat Reader on top of other windows in such a way that it is always accessible and couldn't be hidden by other windows. It is a great function when working with multiple windows open at once, particularly when you need to drag-n-drop some information from/to Adobe Acrobat Reader.
If you want to remain Acrobat Reader always visible (e.g. if you are working with Microsoft Word simultaneously) activate this nifty function. It will be of great benefit to you because there will be no necessity to spend time on switching between windows.
Minimize Adobe Acrobat Reader to Tray
If during reading Adobe Acrobat Reader documents you have ever met with a situation when some urgent and pressing affairs happen and you have to delay your work, you know how unpleasant it can be. You must come back to the document later but while looking for the place where you've stopped you lose your time. However, there is a way how to sort out this problem. It takes only several clicks of your mouse to minimize Adobe Acrobat Reader to the system tray:
Resize Adobe Acrobat Reader to Most Usable Size
If you need to change the current size of Adobe Acrobat Reader on-the-fly, just right-click the ![]() Resize button. You will get access to the wide range of predefined sizes.
Resize button. You will get access to the wide range of predefined sizes.
Position Adobe Acrobat Reader to Most Preferable Place on the Desktop
To position Adobe Acrobat Reader to the most convenient place on the desktop click the ![]() Align button. It provides the automatic horizontal and vertical alignment of Adobe Acrobat Reader in nine predefined alignment modes (just right-click the button).
Align button. It provides the automatic horizontal and vertical alignment of Adobe Acrobat Reader in nine predefined alignment modes (just right-click the button).
Roll Up Adobe Acrobat Reader
The newMove Adobe Acrobat Reader to Next Monitor
If you have several monitors connected to your computer the Move to Monitor tool be your mate. When you want to move Adobe Acrobat Reader from one screen to another, you can click on the ![]() Move to Monitor title button and the window will move to the next monitor. In other words, if a window is displayed on Monitor 1, it moves to Monitor 2. No need to drag it manually!
Move to Monitor title button and the window will move to the next monitor. In other words, if a window is displayed on Monitor 1, it moves to Monitor 2. No need to drag it manually!
Conclusion
Actual Title Buttons makes your work with Adobe Acrobat Reader and other applications extremely simple and convenient. The new buttons are as easy to use as the standard Windows� Minimize/Maximize/Close and they make Adobe Acrobat Reader more user-friendly, convenient and stylish. It is an ideal solution if you usually multitask in several applications.
Interested? Try it out, Actual Title Buttons is easy-to-use and very handy!
Useful Links
See the following links that will be your guides in getting acquainted with Actual Title Buttons:
- Download the the fully-functional 60-days trial version of Actual Title Buttons right now. It is completely free!
- Actual Title Buttons Home � the official page where you can download or order the risk-free version and read what users say about Actual Title Buttons.
- Actual Title Buttons Help section � the full list additional buttons available in Actual Title Buttons
- Here you can find the information on how to create specific settings for Adobe Acrobat Reader or any other window
Check out our articles. You may find other ways for using new title buttons and other features to make your work easier!
How to Make Your Desktop More Useful with Actual Window Guard
Best software to get full control of startup windows.
How to Get New Windows 10 UI Features in Windows 7/8 with Actual Window Manager 8.3
Wanna new Windows 10 features in Windows 7/8? You can get them without upgrading, just use Actual Window Manager 8.3.

Actual Window Manager helps online stock and day traders work effectively
If you work with 8-10 applications, you are most likely to feel tired after an hour or two... This program is a complete solution for those who multitask in multiple applications simultaneously.
Windows 8: Better Alternative to a Native Multi-Monitor Taskbar
Comparison of Windows 8 native multi-monitor taskbar with the alternative provided by Actual Multiple Monitors.
How to keep system dialogs Always-on-Top
This article describes how you can stay on top any system dialogs such as 'Add/Remove Programs', 'System Properties', 'Time/Date Properties' and doesn't allow other windows to hide it partially or completely.
Desired Software for the Mouse on Multi-Monitor PC
Actual Multiple Monitors offers many useful features for the mouse on multiple monitors PC.

Optimize Microsoft Word by means of Actual Window Manager!
Actual Window Manager presents a great variety of functions for working in Microsoft Word. By using them, you will be able to decrease the time you usually waste on switching between windows of different documents, keep your desktop in order and work much quicker.
Add 'Minimize To Tray' feature to your favorite offline browser
If you usually switch to another application and work with it, while the offline browser is doing its job, it may be very convenient to minimize the program to the system tray or to any place of your screen and save taskbar space.

How to Play Diablo 3 on Multiple Monitors: Tips and Tricks
How to prevent the unwanted minimization of the full-screen game? How to lock mouse in the game window? If you want to play Diablo 3 on multiple monitors, read this little article.
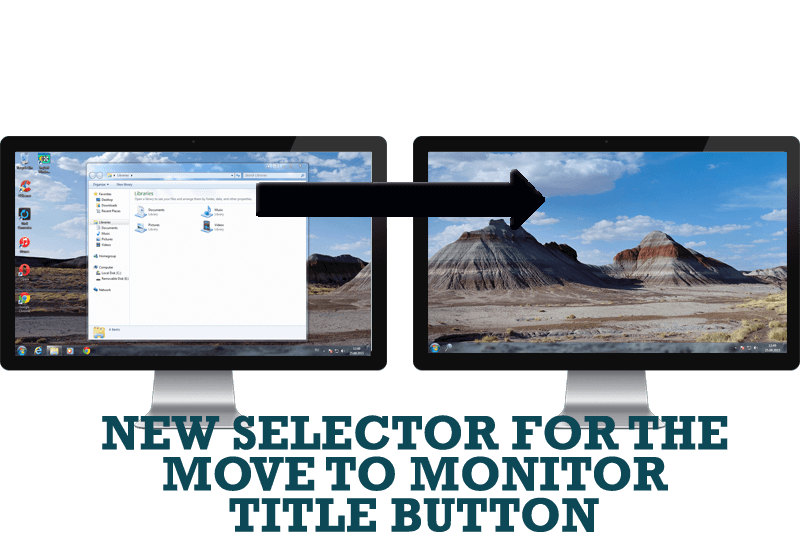
New Selector for the Move to Monitor Title Button
Move a window to the desired position of multiple monitors in one click by the improved Move to Monitor selector.
