
|
|
Multi-monitor Taskbar
Available in: Actual Window Manager, Actual Multiple Monitors.
Even modern versions of Windows® like Vista/7 still show the Taskbar on the primary display only:
Figure 1. General Windows® Taskbar in a multi-monitor environment
The Multi-monitor Taskbar extension emulates the original Windows® Taskbar on each secondary display as well. With this extension, you can easily control the open windows (activate/minimize them, switch between them) in habitual manner, disregarding which monitor you are currently working with - primary or any of secondaries:
Figure 2. Multi-monitor Taskbar extension
This extension can work in two different modes: individual (default) and mirror. In individual mode, each taskbar displays the buttons only for windows which are on the same monitor (i.e. taskbar on monitor #1 displays only windows situated on monitor #1, taskbar on monitor #2 - windows on monitor #2, and so on).

Figure 3. Multi-monitor Taskbars in individual mode
In mirror mode, all taskbars display all open windows no matter what monitor a particular window is on (i.e. all taskbars show the identical set of buttons).
![]()
Figure 4. Multi-monitor Taskbars in mirror mode
![]()
Figure 5. Start button on each Taskbar
If you are using Windows 7 - you can take advantage of its new taskbar features on secondary monitors as well: each secondary taskbar has the Show Desktop button, supports Jump Lists, shows a progress bar on taskbar buttons when appropriate, allows to pin buttons by drag-n-drop, displays the colorized highlight for a button under the mouse and gives multiple previews for tabbed browsers.
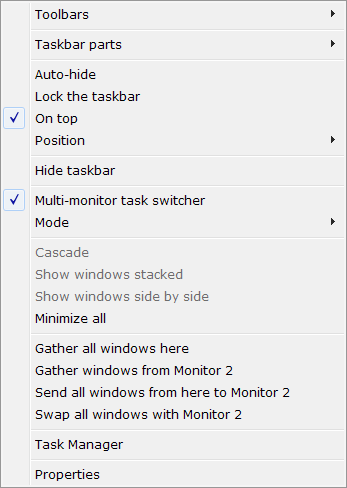
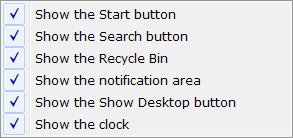
For example, you can easily toggle the visibility of almost any taskbar control (Start button, notification area, clock, Show Desktop button, Search button, Virtual Desktops Switcher button, Recycle Bin button) via Taskbar parts submenu:
You can also hide taskbars on particular monitors. Once hidden, certain taskbar can be restored either via tray icon's context menu, Desktop's context menu or Unhide taskbars button.
In addition, you can control taskbar mode and some of its options, as well as the related Task Switcher extension. Note that you can lock secondary taskbars or force them auto-hide in the same way you do with the primary taskbar. Locked taskbars cannot be moved or sized (that prevents the accidental change of their placement), automatic hiding can save you some valuable screen space for your applications. You can turn on/off the "Lock" and "Auto-hide" options individually for each secondary taskbar. Also, there are commands to manipulate several windows at once ("subject monitor" mentioned below is the monitor where you invoked particular command):
Cascade/Show windows stacked/Show windows side by side commands - various methods of auto-arranging all open windows on a certain monitor
Minimize all/Restore all commands - if you are using the individual mode then you can quickly minimize all open windows on the subject monitor and restore them back in a single click (in mirror mode windows will be minimized/restored on all monitors at once)
Hint
In Windows 7 you can also use the native Aero Shake feature to minimize all windows on a particular monitor.Gather all windows here command - puts windows from all monitors onto the subject monitor
Get here all windows from command/submenu - retrieves all windows from a specified monitor and puts them onto the subject monitor
Send all windows from here to command/submenu - transfers all windows from the subject monitor to a specified one
Swap all windows with command/submenu - swaps all windows between a specified monitor and the subject monitor
Finally, taskbar's context menu lets you quickly set taskbar's position in a monitor (left/top/right/bottom edge) and launch the Windows Task Manager. Taskbar positions are stored independently for each monitor.
In addition to all above-mentioned, there are some extra usability features:
You can manually re-order taskbar buttons and system tray icons on secondary taskbars as well as on the primary one - simply dragging them with the mouse;
If you are still using Windows XP/2003 - you may find useful the Window Thumbnails service which was presented in Windows Vista: each time you place the mouse pointer over any taskbar button, the reduced copy of that button's corresponding window is displayed along with the regular tool tip. This service highly increases the recognition of minimized windows without the need to restore them.
Note
Applications that were written with no accurate conforming to the rules of development for Windows may be incompatible with this service.Hint
Under Windows 7 previews support the native Aero Peek feature.With the preview thumbnails, you can create custom taskbar groups. By default, Windows groups running tasks in the taskbar by the application (e.g. several open Word documents, several Explorer folders, etc.). However, in many cases such kind of grouping is irrelevant because the more preferable way is grouping the tasks by their belonging to a certain activity, disregarding the application. Thus, group may consist of a Word document, Excel worksheet, Explorer folder and any other application's window(s).
To add certain window into a group, drag its preview thumbnail and drop it onto the group button (or another window's button to make a new group).
Note
Dragging the preview of a browser tab (Internet Explorer, Chrome, Firefox, etc.) will add the entire browser window into the group, not just that separate tab.To remove window from a group, drag its preview thumbnail out of the group preview and drop it onto the empty taskbar space.
To handle groups in a quick and easy manner, the Tile/Cascade/Minimize/Restore/Move to Monitor commands have been added. These commands can be invoked:
via caption buttons in the group's preview window
via group button's context menu (you can invoke it using Shift-RClick on the group button)
-

Figure 6. Search buttonand Virtual Desktops Switcher (called Task View in Windows 10)
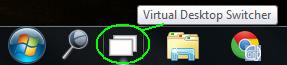
Figure 7. Virtual Desktops Switcher buttonto make the taskbars look and work as in Windows 10.
Also, you can add the Recycle Bin button to make the system Recycle Bin always in sight so that you can access it any time.

Figure 8. Recycle Bin button Nifty little addition for those who prefer such visual themes as Windows Classic or XP Blue/Green/Silver and use the multi-row view of Taskbar is the ability to stretch the Start button out to the full taskbar's height/width (depending on whether it is placed horizontally or vertically). This fixes the usability flaw of the Start button by eliminating the need to aim it precisely - when it is stretched out to the taskbar, you can quickly throw the mouse to that corner and click the left button being assured you will hit the Start button!
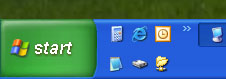
Figure 9. Start button stretched out to a multi-row taskbarYou can replace the system taskbar with its Actual Tools implementation to use the advanced features (like Pin or group window movement commands) on a primary monitor too.
The final touch is the ability to make all taskbars transparent to view the background picture behind them!
